Loading... Please wait...

Categories
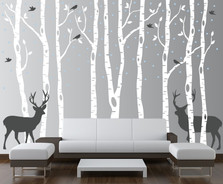
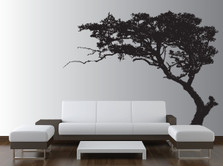
Current Top Sellers
-
1
-
2
-
3
-
4

-
5


How to
Innovative Stencils Wall Decal Application
Pre-Application
1) Make sure that the surface you are planning to apply your decal to is smooth (light wall texture such as orange-peel texture is ok), wiped clean, and dry. Newley painted walls should be allowed to dry for at least one week.
2) Gather all the necessary tools to apply your decal. This may include Scissors, a Tape Measure, Pencils, Erasers, Masking Tape, and a Squeegee (a credit card or anything similar can also be used).

3) Your decal will come rolled up inside of its box, take the decal out and unroll it. Any wrinkles or imperfections are normal and will disappear once the. Do not try to smooth out any wrinkles at this point, they will disappear once the backing paper is removed. Your decal consists of three layers, as shown here; the transfer tape on top, your vinyl decal in the middle, and the backing paper on the bottom.

Application
1) Depending on which decal you have, it may consist of a number of sections. These can all be easily separated by using a pair of scissors to cut between them.

2) Using masking tape, place your decal up on the wall and adjust your placement as necessary. A tape measure can be used here to ensure everything is level. Be sure to measure twice because the decals can only be applied once! Once you are happy with placement, guidelines may be drawn with a pencil onto your walls. Guidelines will help you re-align the decal if some of the tape comes loose during application. Be sure that pencil marks will erase off your walls if you choose to draw these in.

3) Use a piece of masking tape to create a vertical or a horizontal hinge (depending on the design) in the middle of the decal as shown in the image. Start with either half and carefully separate the backing paper layer from the other two. Make sure that all of the vinyl is being lifted from the paper backing paper, if not give the vinyl and transfer tape a firm rub.

4) Carefully cut off the section of backing paper you have just separated from the decal. Take care to not cut into the other 2 layers.

5) Starting from where the backing paper was cut off, press the other two layers back down onto the wall. Work slowly from here back out to the edge so bubbles and creases do not form. Once these two layers are adhered to the application surface, use your squeegee with moderate pressure and go back over this side of the decal.
6) Repeat step five for the other section of your decal. Once the other side is applied, use your squeegee to go over the decal a final time to ensure that the vinyl will adhere to the application surface.

7) Repeat steps two through five for other pieces that came with or were trimmed off the original product.

8) Peel off the transfer tape (the very top layer). Do this by pulling slowly and carefully at a 180-degree angle. If any of the vinyl decal comes off along with the transfer tape, go back over that section with a squeegee and try peeling the top layer off again. In some cases it may be necessary to wait 24 hours before doing this step to allow the vinyl adhesive to bond to the surface, stain resistant paints and some low-VOC paints will require this.

9) Congratulations! The decal should now be securely applied to your surface. As an extra step, you can use your fingers to press the decal into the wall to make sure it stays put.

Don't see a
design you need?